The Magic of Green Screens
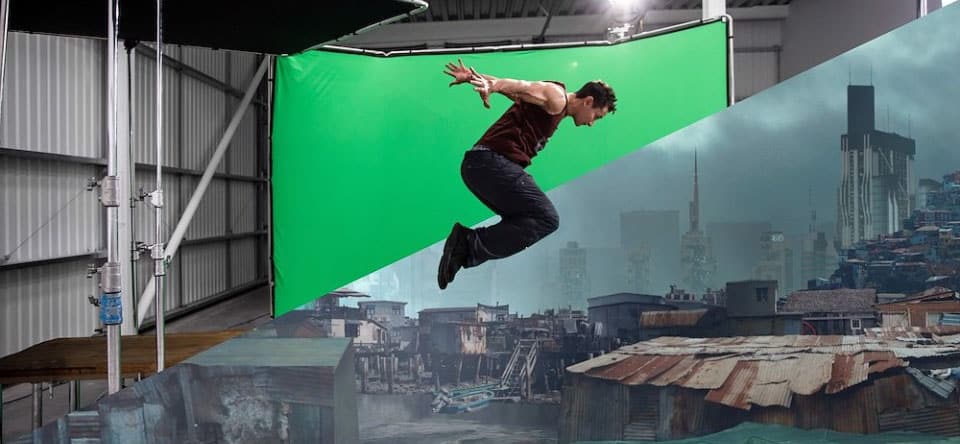
Have you ever wondered how weather forecasters appear in front of dynamic weather maps, or how actors seamlessly interact with fantastical creatures on screen? The answer lies in the power of green screens, a technology that revolutionized the world of video production.
Imagine transporting yourself to a tropical beach for your next vacation video, even if you’re filming in your living room. Green screens make such feats possible, allowing you to replace the background behind your subject with any image or video imaginable.
This comprehensive guide will delve into the world of green screens, equipping you with the knowledge and techniques to create professional-looking videos that transcend physical limitations. Whether you’re a seasoned videographer or just starting out, this in-depth exploration will answer all your green screen questions and empower you to bring your creative vision to life.
What is a Green Screen?
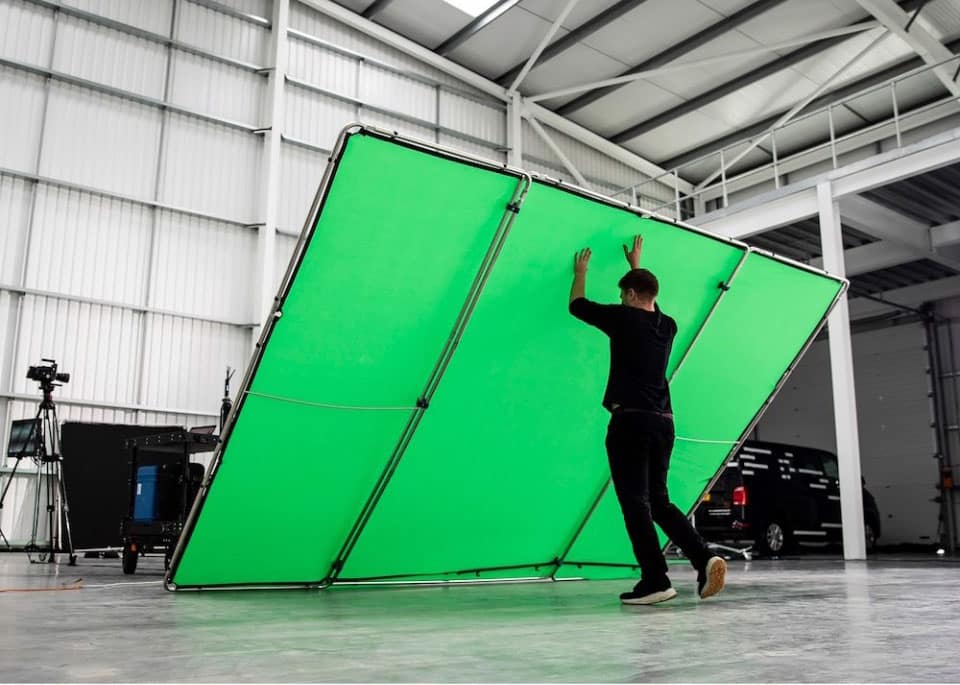
A green screen, also known as a chroma key screen, is a large backdrop made of green fabric, vinyl, or even a painted surface. During filming, the subject stands in front of the green screen. In post-production, using a technique called chroma keying, the green color is electronically removed and replaced with another image or video, creating the illusion that the subject is in a different location entirely.
Here’s a table summarizing the key aspects of green screens:
| Feature | Description |
| Function | Replaces the background behind a subject in video or photograph. |
| Technology | Chroma keying isolates a specific color range (usually green, but can also be blue yellow or red) for background replacement. |
| Benefits | Creates fantastical scenes, simulates different locations, enhances video production value. |
| Applications | Filmmaking, news reporting, product demonstrations, educational videos, and more. |
Benefits of Using Green Screens
Green screens offer a multitude of advantages for video creators, making them a popular tool across various industries. Here are some key benefits:
- Limitless Creativity: Green screens unlock a world of creative possibilities. You can transport your viewers to any location imaginable, from bustling cityscapes to underwater worlds.
- Cost-Effectiveness: Compared to filming on location, green screens offer a cost-effective way to create diverse video backgrounds.
- Enhanced Production Value: Green screens allow you to add professional-looking backgrounds to your videos, elevating their overall quality and impact.
- Versatility: Green screens have applications across various video genres, from filmmaking and news reporting to educational content and product demonstrations.
- Control Over the Environment: Green screens provide complete control over the background, eliminating distractions and allowing you to focus on your subject.
How Green Screens Work: A Basic Overview
The magic behind green screens lies in a post-production technique called chroma keying. Here’s a simplified breakdown of the process:
- Filming: You record your video footage with the subject standing in front of the green screen.
- Color Selection: In editing software, you select the specific green color range to be removed.
- Background Replacement: You choose the desired image or video to be placed behind your subject, effectively replacing the green screen.
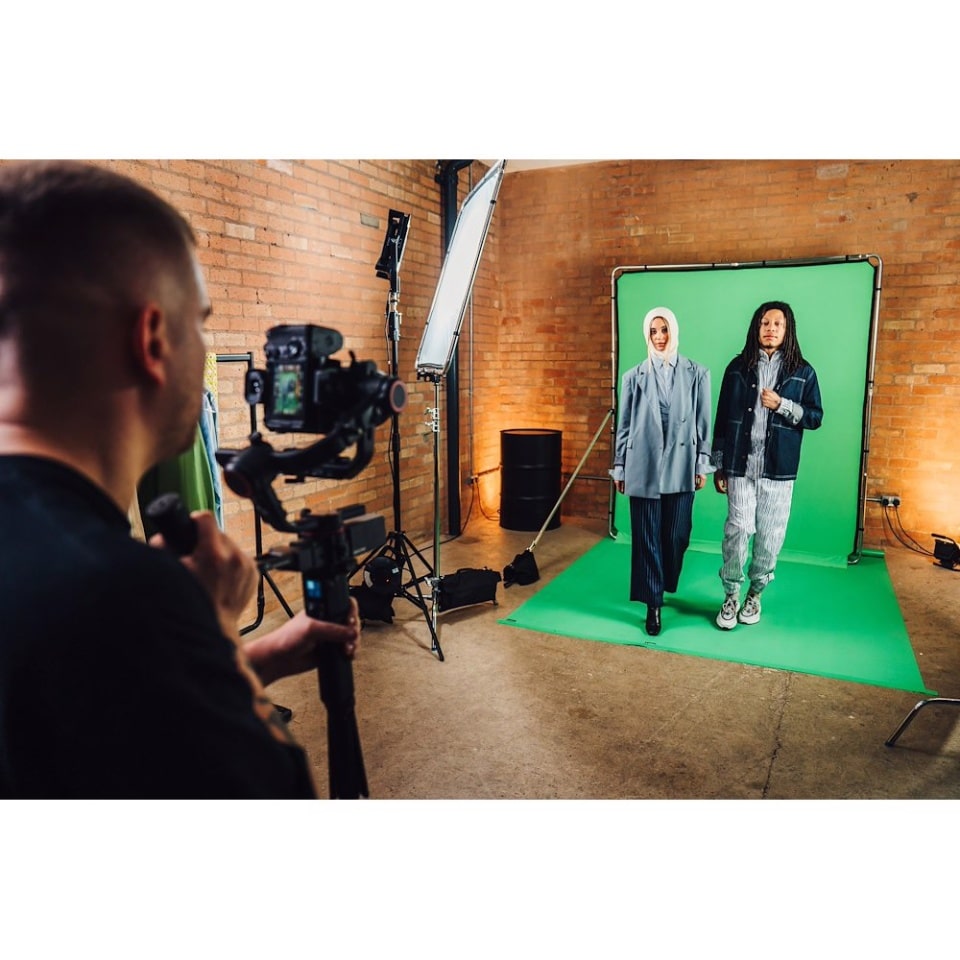
The success of green screen compositing hinges on two crucial factors: even lighting and color selection. We’ll explore these elements in detail in the next section.
This first section lays the groundwork for understanding green screens. Let me know when you’d like me to proceed to the next section on “Demystifying Green Screen Technology.”
Demystifying Green Screen Technology
Now that we’ve grasped the fundamental concept of green screens, let’s delve deeper into the technical aspects that make them work. This section will explore chroma keying in detail, along with lighting techniques and green screen backdrop options.
Chroma Keying Explained
Chroma keying is the heart of green screen technology. It’s a post-production process that isolates a specific color range within the video footage and replaces it with another image or video.
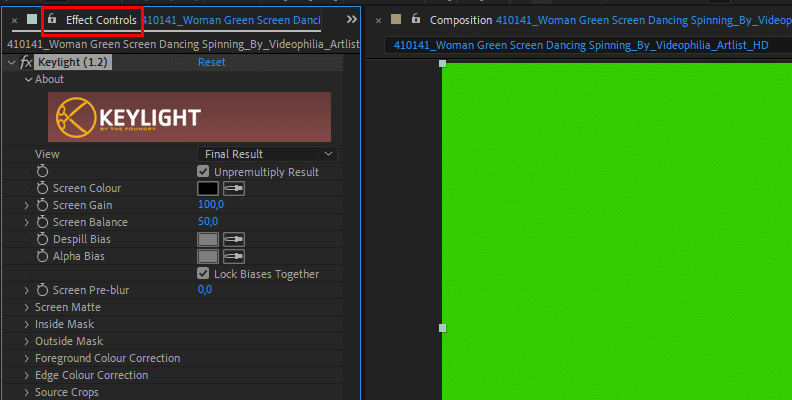
Here’s a breakdown of the chroma keying process:
- Color Selection: Using your video editing software, you select the specific color range you want to remove. Green is typically chosen because it minimally clashes with human skin tones.
- Spill Suppression: Lighting imperfections can cause some green color to spill onto your subject. Chroma keying tools offer functionalities to minimize this “spill,” ensuring a clean separation between the subject and the background.
- Feathering: The edges of the subject might appear rough or blocky after chroma keying. Feathering helps soften these edges, creating a smoother transition between the subject and the new background.
There are two main types of chroma keying techniques:
- Luma Keying: This technique isolates pixels based on their brightness (luma) levels. While simpler to use, it can be less effective with unevenly lit scenes or subjects with reflective surfaces.
- Chroma Keying: This is the preferred method for green screens. It isolates pixels based on both color and brightness, providing a more precise selection and cleaner results.
Benefits of Chroma Keying:
- Clean Background Separation: Allows for precise removal of the green screen, leaving a clean background for compositing.
- Versatility: Works with various background colors (not just green) depending on the project’s needs.
- Control Over Background: Enables you to replace the background with any image or video, offering creative freedom.
Lighting for Green Screens
As mentioned earlier, even lighting is paramount for achieving clean and seamless green screen composites. Here are some key lighting principles to consider:
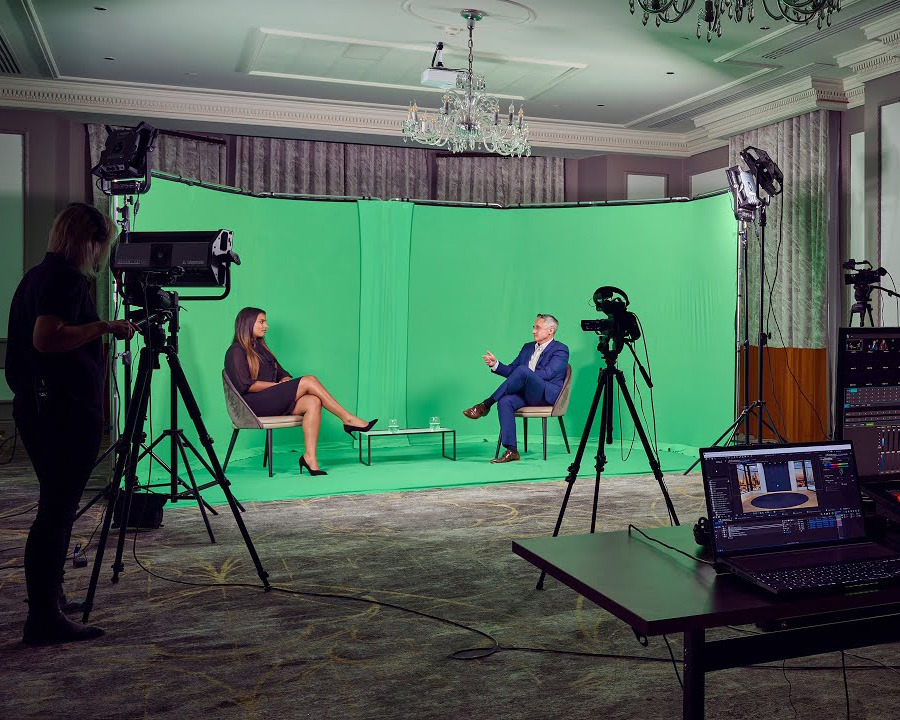
- Uniform Illumination: The green screen background should be evenly lit to avoid shadows or wrinkles, which can interfere with the chroma keying process. Aim for a flat, consistent green across the entire surface.
- Separate Lighting: Use separate light sources for your subject and the green screen. This prevents spillover, where light from one area affects the other, making it harder to remove the green precisely.
Here’s a table outlining a basic three-point lighting setup for green screens:
| Light Source | Position | Purpose |
| Key Light | Main light positioned in front of your subject | Illuminates the subject from the front, creating the primary light source. |
| Fill Light | Placed opposite the key light, but softer | Fills in shadows on the subject’s face and body for a more balanced look. |
| Backlight | Positioned behind the subject | Separates the subject from the background and adds depth. |
Additional Lighting Tips:
- Use softboxes to diffuse light sources and create a flattering, even glow on your subject.
- Experiment with different lighting setups to achieve the desired look and mood for your video.
- Ensure the color temperature of your subject lighting matches the color temperature of your background image or video for a realistic composite.
Green Screen Backdrop Options
Green screens come in various forms, each with its own advantages and considerations:
- Muslin Fabric: Affordable and portable, muslin fabric offers a good balance between price and quality. However, it can wrinkle easily and requires ironing for a smooth surface.
- Vinyl Backdrop: Vinyl provides a wrinkle-resistant option, ideal for situations where mobility is less crucial. They are typically more durable than muslin but may cost slightly more.
- Pop-Up Green Screen: A convenient choice for small spaces, pop-up screens are easy to store and assemble but may not be as durable as other options.
- Painted Surface: You can create a DIY green screen by painting a wall a uniform green. This approach requires a well-ventilated space and proper paint selection for chroma key compatibility.
Choosing the Right Green Screen:
The best green screen option for you depends on your budget, project needs, and available space. Here’s a quick guide to help you decide:
- For portability and affordability: Muslin fabric, but wrinkles and creases easily.
- For wrinkle resistance and durability: Vinyl backdrop but heavy
- For small spaces and quick setups: Pop-up green screen like the manfrotto studio link
- For a permanent and budget-friendly option: Painted wall (if space allows). Paint can be mixed to match green sample at some specialist paint stores.
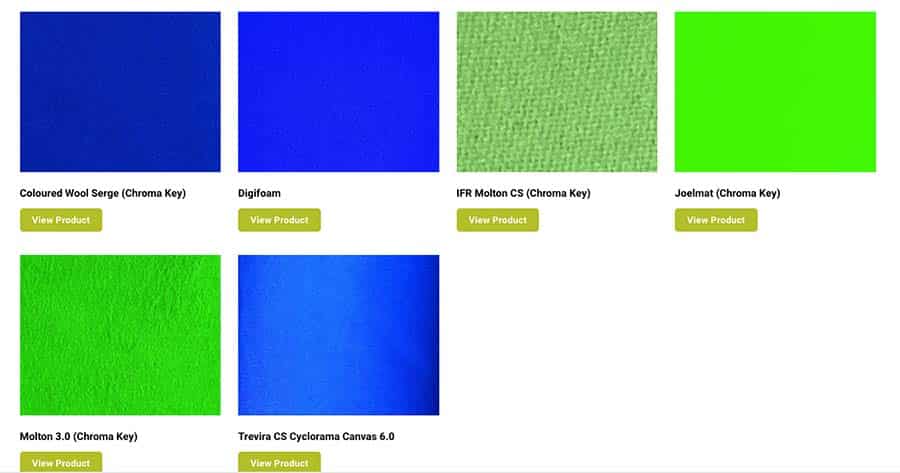
Green Screen Color Options:
While green is the traditional choice, blue screens can be useful in specific situations, for instance when your actors or talent is wearing green clothing. It is good practise to take a green and blue screen along to any shoot just incase you a persons clothing matches the green screen. Please see pros and cons in the green screen color options section below.
Filming with a Green Screen: A Practical Guide
Now that you possess a solid understanding of green screen technology, let’s explore the practical aspects of filming with a green screen. This section will equip you with essential tips and techniques to ensure a smooth and successful filming experience.
Pre-Production Considerations
Before you start rolling the camera, here are some crucial pre-production steps to take:
- Choosing the Right Green Screen: Refer back to Section II to consider factors like material, size, and portability when selecting your green screen.
- Setting Up the Green Screen: Ensure your green screen is evenly lit and free of wrinkles or creases. You can iron muslin fabric or use a steamer to achieve a smooth surface.
- Subject Clothing Selection: Avoid clothing with green tones that might blend into the background during chroma keying. Opt for neutral colors or patterns that contrast well with green.
Green Screen Filming Techniques
Here are some key filming techniques to keep in mind when working with a green screen:
- Camera Settings: Use a camera with a high-resolution capability to capture clear and detailed footage. Experiment with different aperture and shutter speed settings to achieve the desired depth of field and motion blur.
- Subject Positioning: Maintain a good distance between your subject and the green screen (ideally 6-10 feet) to minimize shadows and allow for even lighting on both the subject and the backdrop.
- Focus: Ensure your subject is in sharp focus throughout filming. Autofocus can be helpful, but manual focus might offer more precise control.
- Test Footage: Before filming your main scene, record a short test clip to check your lighting, color selection, and overall green screen setup. This allows you to make adjustments and troubleshoot any potential issues before capturing your final footage.
Additional Filming Tips:
- Use a tripod for stability and consistent framing throughout your shoot.
- Communicate clearly with your subject to ensure they understand their movements and positioning within the scene.
- Consider using reference imagery or storyboards to visualize the final composite with your chosen background.
Green Screen for Beginners: Tips and Tricks
If you’re new to green screen filming, here are some budget-friendly tips and tricks to get you started:
- DIY Green Screen: Create a cost-effective green screen by hanging a large sheet of unwrinkled green fabric behind your subject.
- Natural Lighting: Take advantage of natural daylight outdoors for even illumination, especially if you’re on a tight budget.
- Maintaining the Green Screen: Keep your green screen clean and wrinkle-free to ensure optimal chroma keying results. You can use clamps or weights to secure the fabric and prevent unwanted movement.
By following these pre-production and filming techniques, you can set yourself up for success when working with a green screen. In the next section, we’ll delve into the editing process, where the magic of green screens truly comes alive. Are you ready to proceed to Section IV: “Editing Magic: Bringing Your Green Screen to Life”?
Green Screen Color Options
While green is the traditional choice for green screens, there are situations where a blue screen might be preferable. Here’s a breakdown of the pros and cons of each color:
- Green Screens:
- Pros:
- Least likely to clash with human skin tones.
- Offers a wider range of green color variations for chroma keying selection.
- Cons:
- Can be problematic if your subject is wearing green clothing or has green hair.
- Pros:
- Blue Screens:
- Pros:
- A good choice if your subject is wearing green clothing or has green hair.
- Effective for isolating brightly colored objects.
- Cons:
- Blue tones can be more present in skin tones, requiring more precise color selection in chroma keying.
- Pros:
Ultimately, the best color choice depends on your specific project requirements. If you’re unsure, experiment with both green and blue screens to see which yields the cleanest results for your footage.
Additional Considerations for Green Screen Backdrops:
- Size: Ensure your green screen is large enough to comfortably accommodate your subject and any planned movements within the frame.
- Seamlessness: Choose a backdrop that offers a seamless surface to minimize wrinkles or creases that might affect chroma keying.
- Durability: Consider the frequency of use and portability needs when choosing the material for your green screen.
Conclusion: Demystifying Green Screen Technology
By understanding chroma keying, lighting techniques, and green screen options, you’re well-equipped to tackle the technical aspects of green screen productions. In the next section, we’ll delve into the filming process with green screens, including practical tips and considerations.
Frequently Asked Questions (FAQs)
Now that you’ve delved into the world of green screens, you might have some lingering questions. Here are some commonly asked questions and clear answers to guide you further:
- Can I use a green screen with my smartphone?
Yes! There are several smartphone apps that offer green screen compositing features. These apps are typically simpler to use compared to desktop editing software but can be a great option for creating quick and easy green screen videos on the go.
- Where can I find free green screen backgrounds (videos and images)?
Several websites offer royalty-free green screen footage and images. Here are a few resources to get you started:
- Pexels: https://www.pexels.com/search/videos/videos/ \
- Pixabay: https://pixabay.com/videos/search/*/ \
- Videezy: https://www.videezy.com/ \
- Mixkit: https://mixkit.co/ \
How can I create a more realistic green screen effect?
Here are some tips for achieving a more realistic green screen composite:
- Lighting Consistency: Ensure the lighting on your subject matches the lighting in your background image or video. This creates a sense of cohesion and prevents the subject from appearing artificially placed. \
- Motion Blur: If your background video has motion blur, consider adding a slight blur to your subject in post-production. This subtle effect helps blend the subject into the background and creates a more realistic sense of movement. \
- Shadows: If your background image or video has shadows, try adding subtle shadows to your subject. This helps ground the subject within the scene and adds depth to the overall composite.
Do You Need Help with Your Green Screen Filming?
At Green Screen UK we have been helping many film and events makers use green screen for their projects, if you need some advice or help please feel free to contact us.
